This is a legacy article. Need how-to instructions for the 4th Generation Tablo? Click here.
Once you've taken your legacy Tablo out of the box and have attached the power, antenna and hard drive, you are ready to set up Tablo via Wi-Fi.
Begin by downloading the Tablo app from the App store, then open the Tablo app on your iPad or iPhone.

You will be taken to the main ADD A NEW TABLO screen. Select ADD VIA WI-FI.
The next screen will instruct you to connect to your Tablo’s network.

To do this, exit from the Tablo app and navigate to the iOS SETTINGS screen.

Select WI-FI under the settings menu.
Your Tablo will appear in the Wi-Fi list. To connect to your the Tablo's Wi-Fi network, select it. A check mark will confirm that you have successfully done so.
If your Tablo's Wi-Fi network does not appear, verify that an ethernet cable is not connected to it. When ethernet is connected to Tablo, its Wi-Fi connection is switched off.

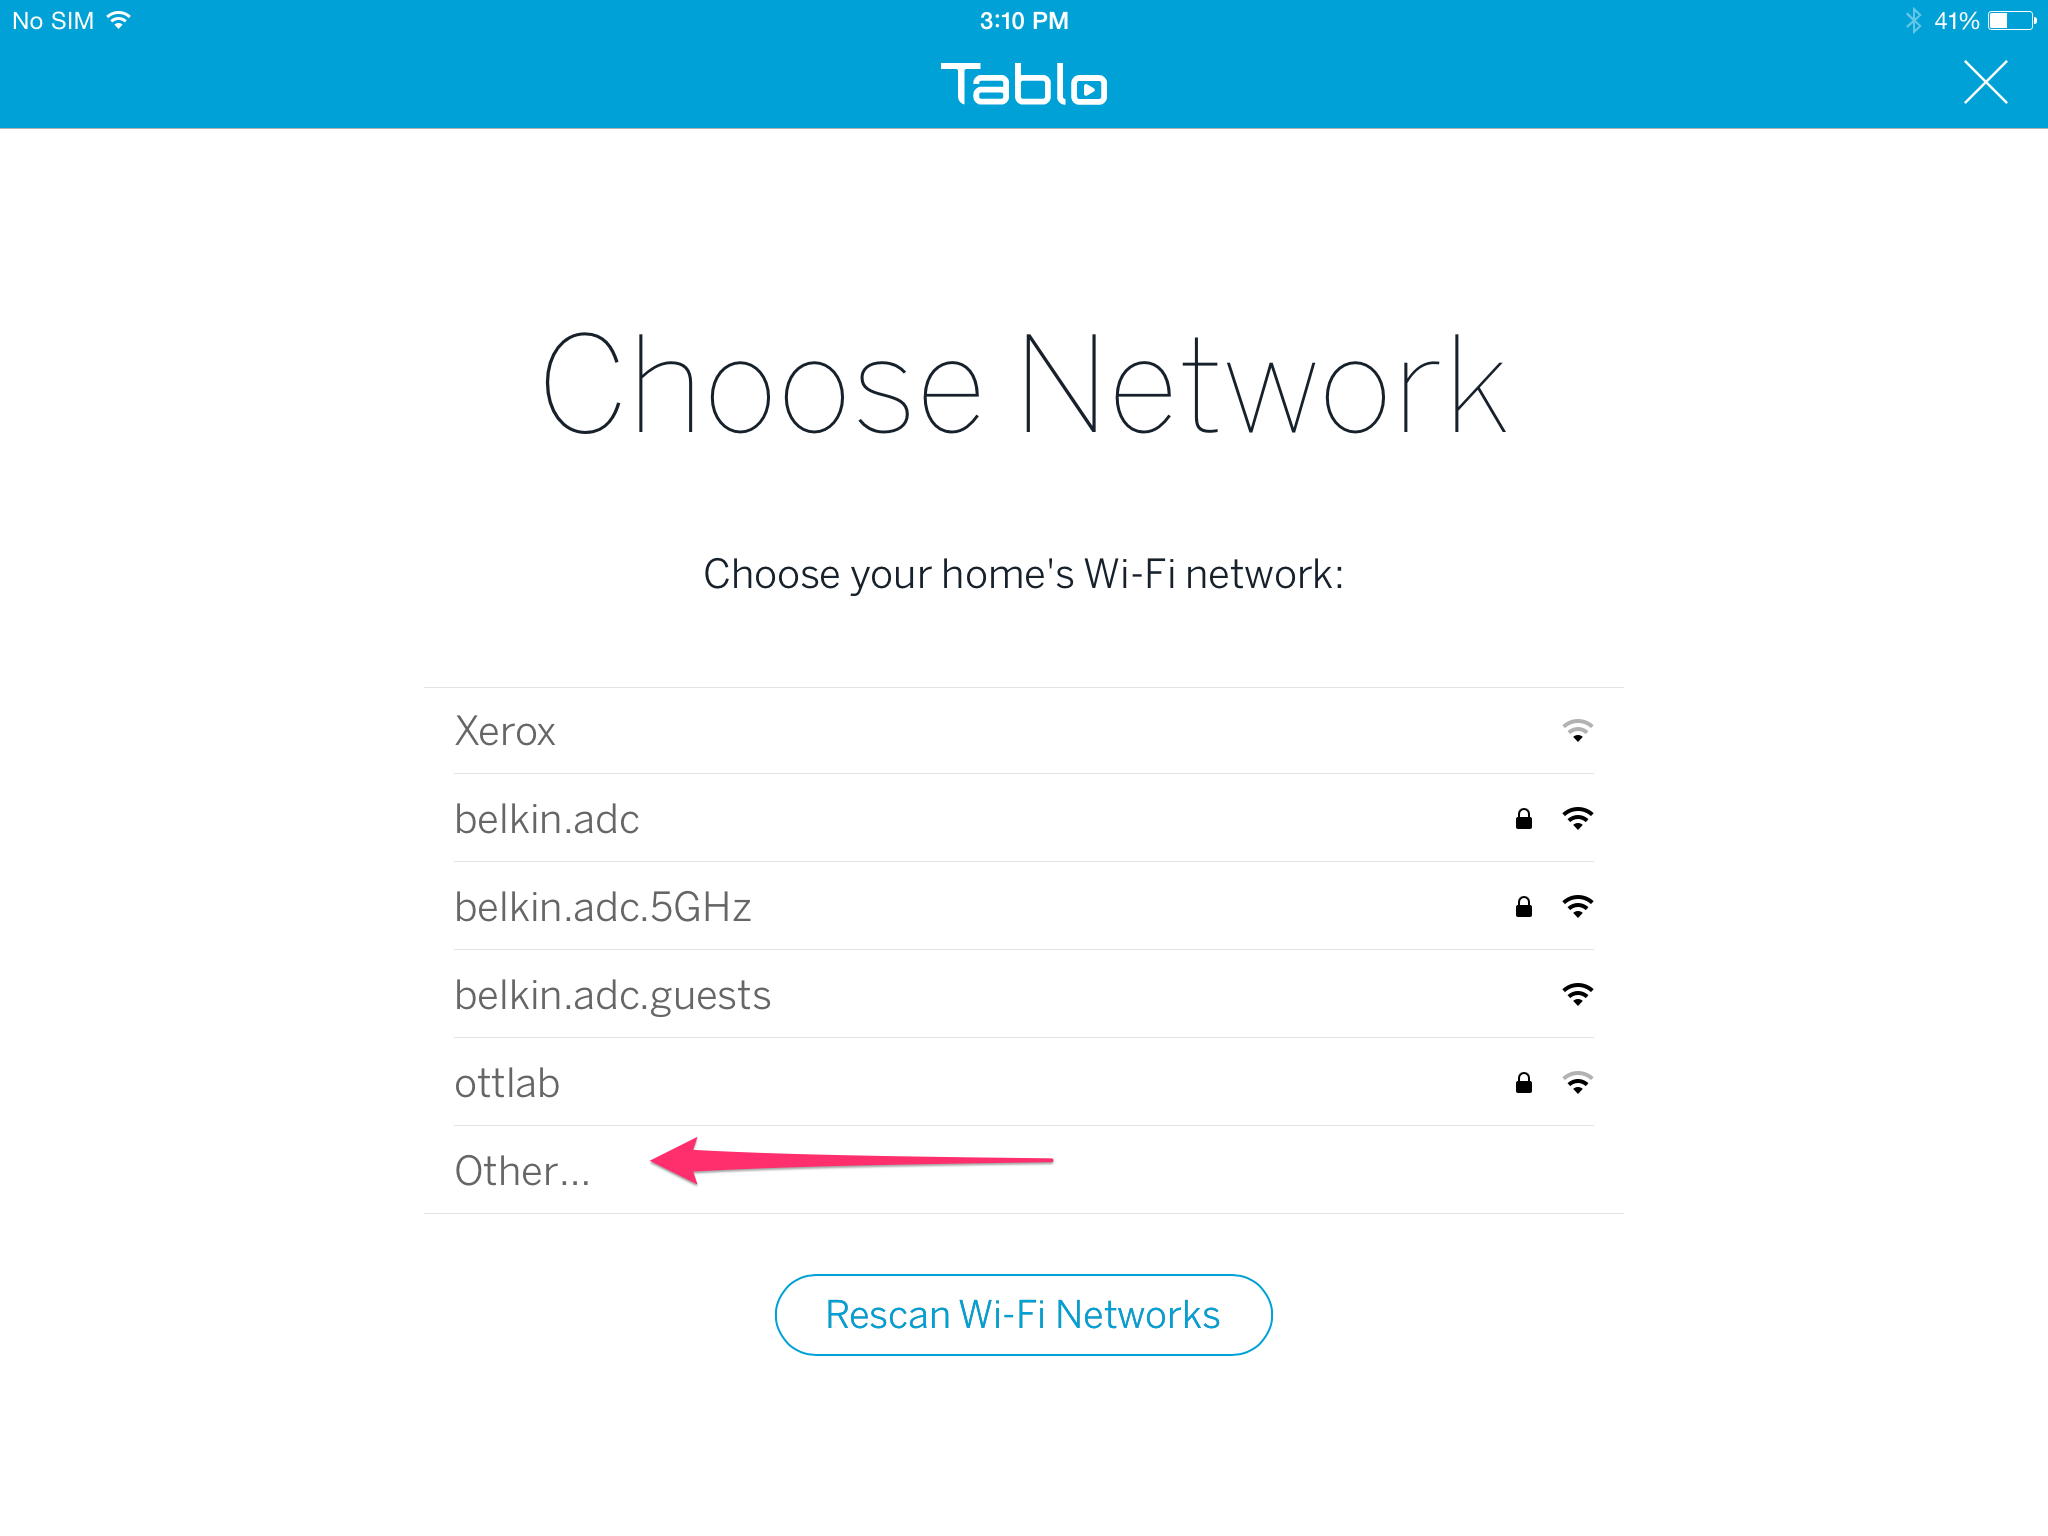
Once you have connected to your Tablo’s Wi-Fi network, return to the Tablo app. A list of detected networks will be displayed. Scroll to the bottom and select OTHER.
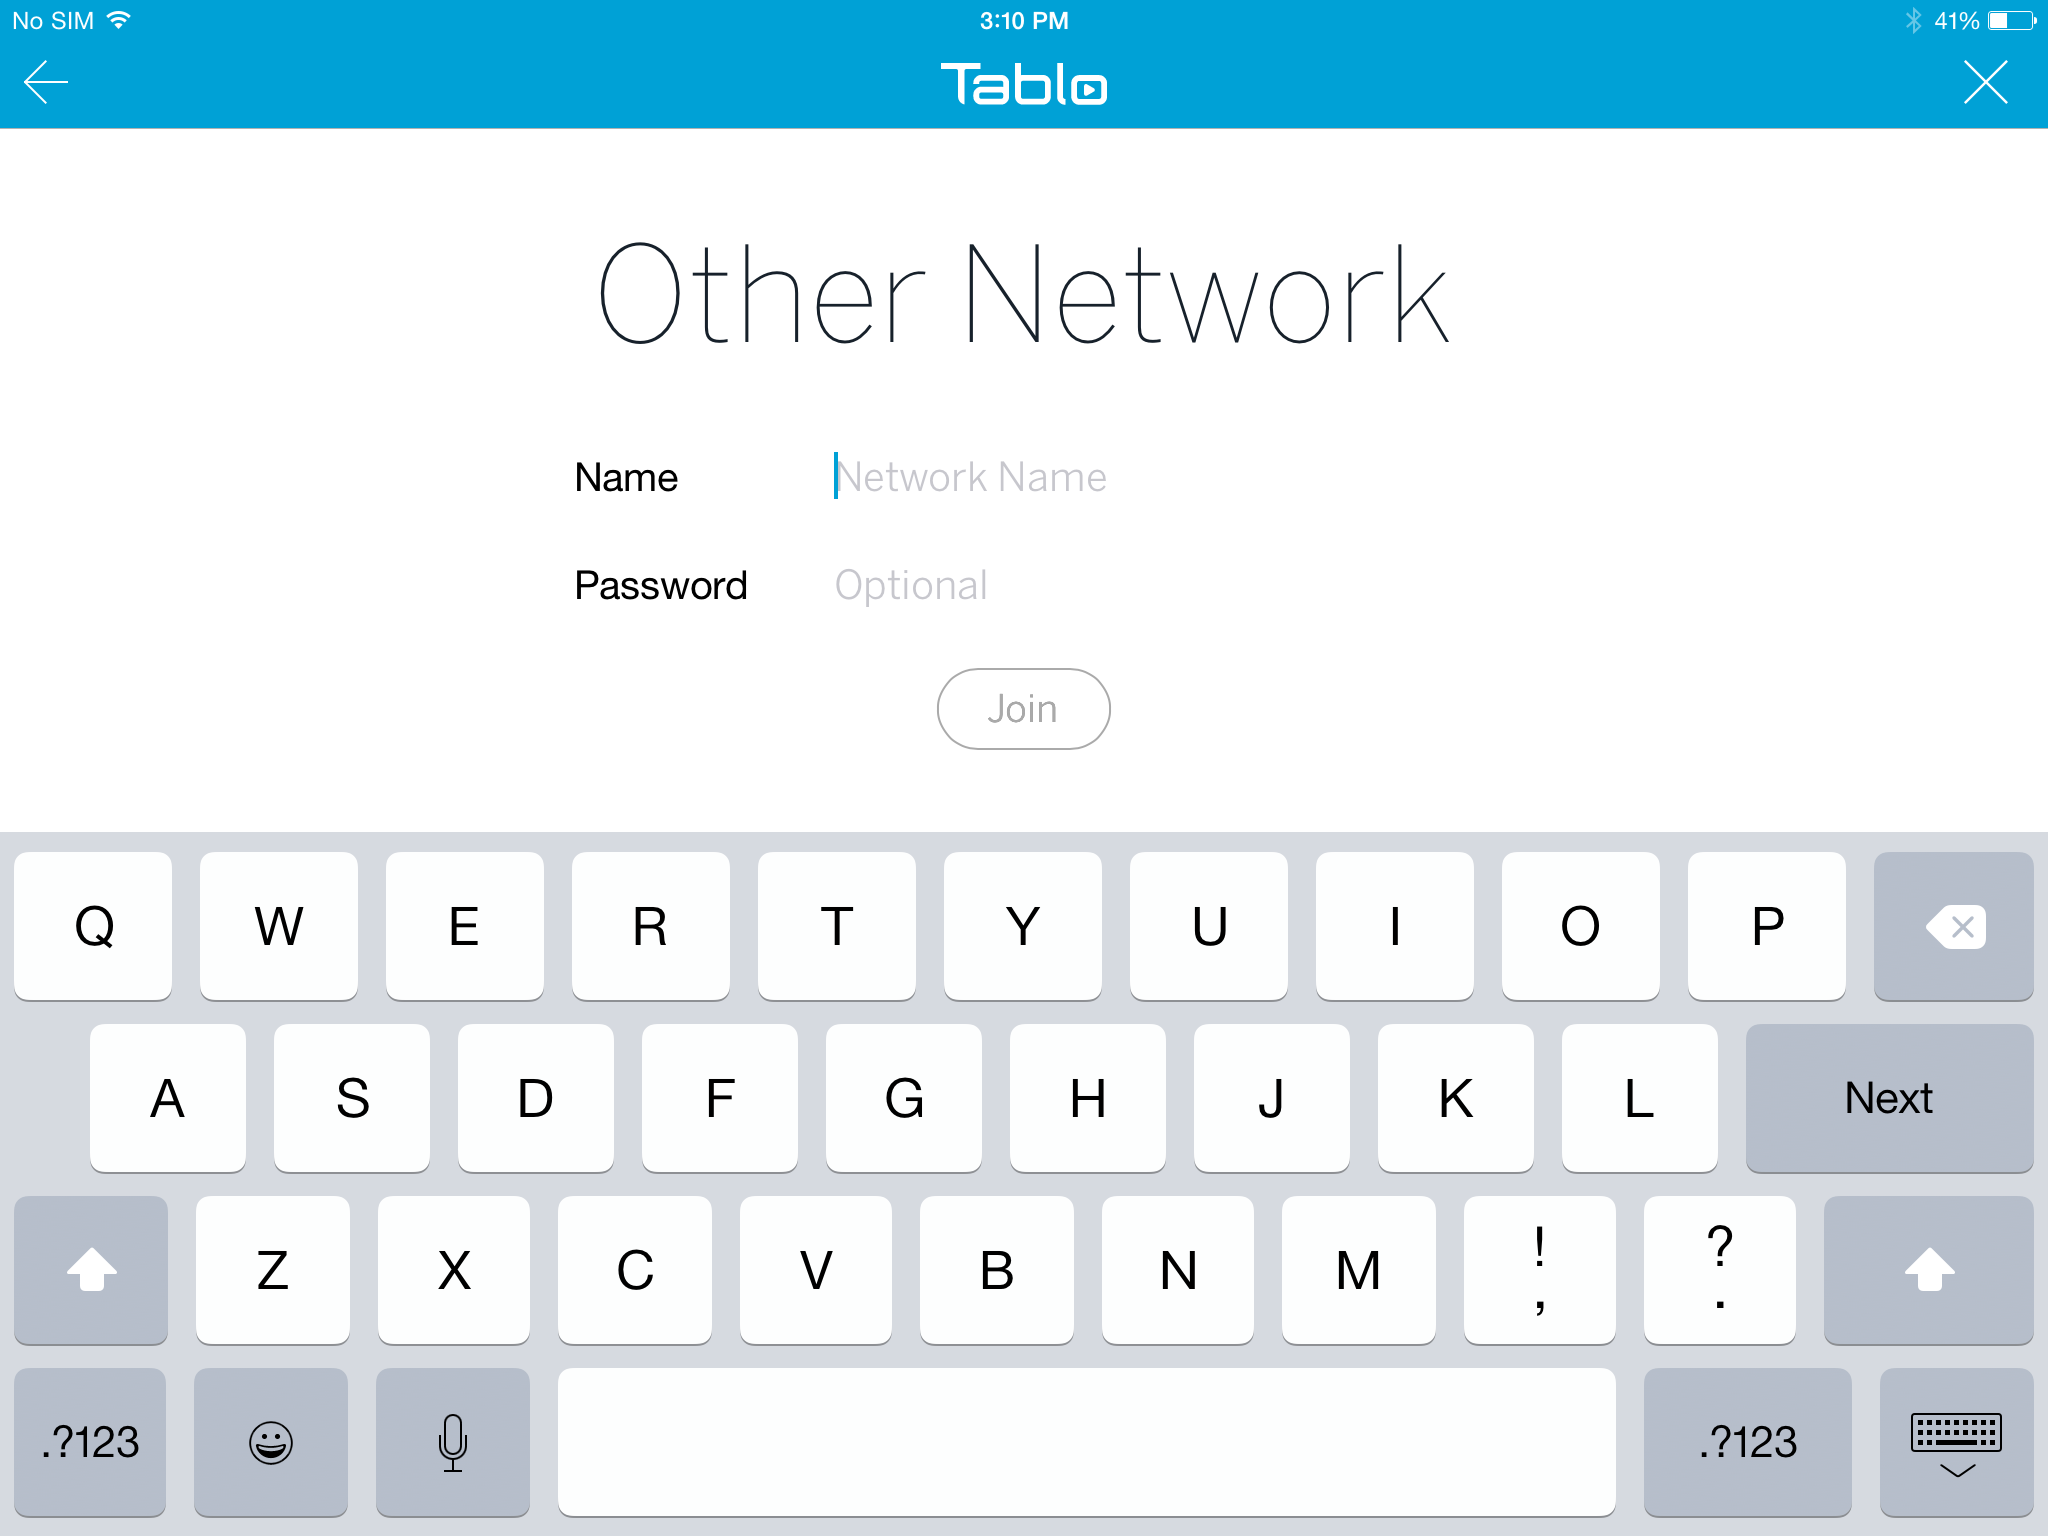
Enter the hidden SSID name and password and select JOIN.
From here, you can begin formatting your hard drive, scanning for channels and using your Tablo!
